[Review] (5주차) 실습
2022.07.16 - [Dev/Swift] - [Xcode] iOS Swift 앱 개발 Byte Degree - week.05
[Xcode] iOS Swift 앱 개발 Byte Degree - week.05
[Review] (4주차) 실습 2022.07.10 - [Dev/Swift] - [Xcode] iOS Swift 앱 개발 Byte Degree - week.04 [Xcode] iOS Swift 앱 개발 Byte Degree - week.04 [Review] (3주차) 실습 2022.07.01 - [Swift] - [Xcode]..
sarahee.tistory.com
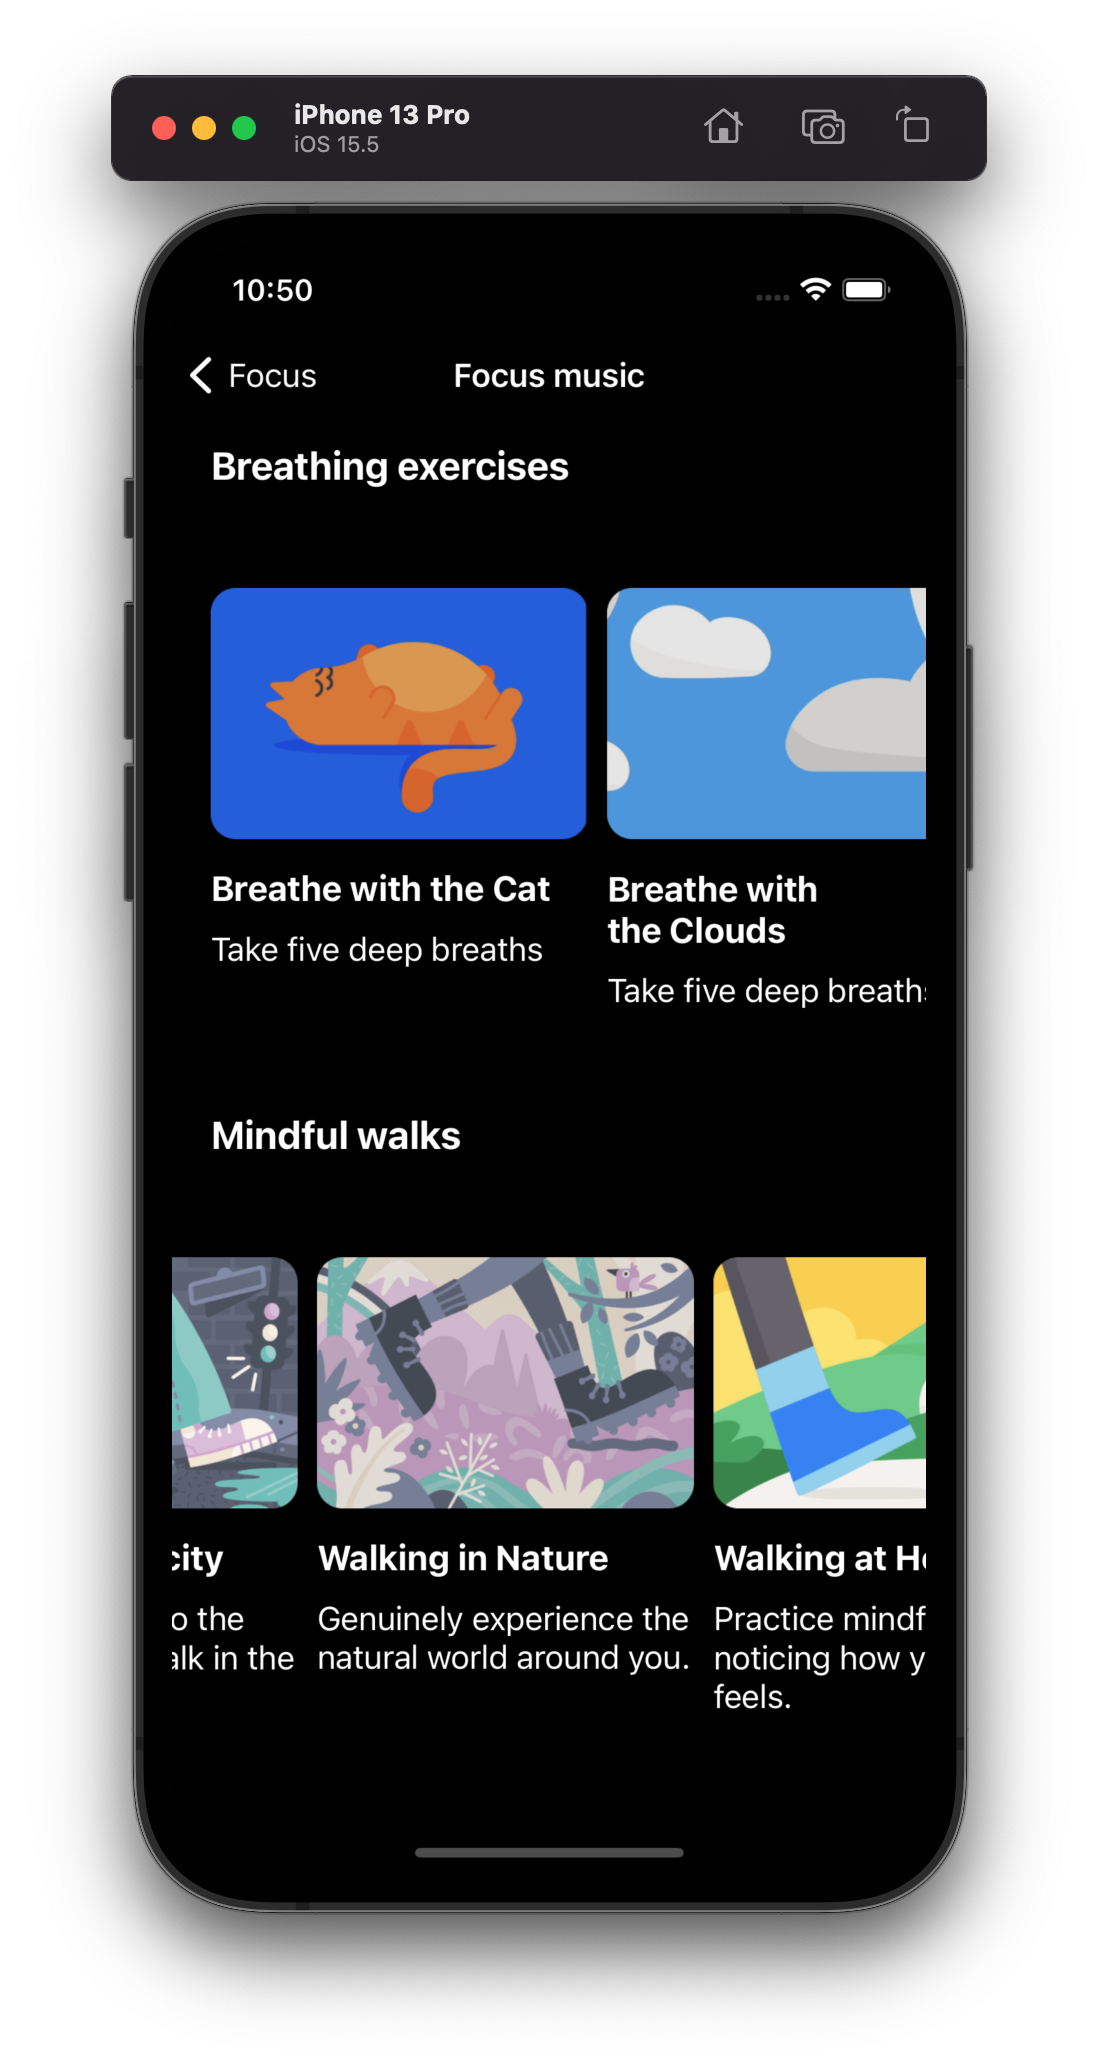
최종 구현

그리드 레이아웃 변경 작업
FocusViewController 및 QuickFocusListViewController의 레이아웃 작업 변경(UICollectionViewCompositionalLayout 응용)
| FocusViewController code | 기존 | 수정 | 해설 |
| item의 .fractionalWidth(1) | 1 | 0.9 | 크기 조절 |
| let group = NSCollectionLayoutGroup.vertical(layoutSize: groupSize, subitems: [item]) | vertical | horizontal | 스크롤 방향: 세로 → 가로 |
| section.orthogonalScrollingBehavior = .groupPagingCentered | 신규 추가 | 스크롤 시 item 중앙 정렬 | |
| section.contentInsets = NSDirectionalEdgeInsets(top: 10, leading: 20, bottom: 10, trailing: 20) | leading: 20, trailing: 20 | leading: 5, trailing: 5 | 좌우 padding 줄이기 |
| group의 .fractionalWidth(1) | 1 | 0.9 | item과 동일하게 설정(group padding이 별도로 설정되지 않도록) |
| section.interGroupSpacing = 10 | 10 | -25 | 좌우 여백값 조절 |
| QuickFocusListViewController code | 기존 | 수정 | 해설 |
| let group = NSCollectionLayoutGroup.horizontal(layoutSize: groupSize, subitem: item, count: 2) | subitem: item, count: 2 | subitems: [item] | 동적으로 할당하도록 개수 설정 해제 |
| section.orthogonalScrollingBehavior = .continuous | 신규 추가 | 스크롤 시 item 정렬되지 않도록(이동한 만큼 위치) | |
| let group = NSCollectionLayoutGroup.horizontal(layoutSize: groupSize, subitems: [item]) |
subitems: [item] | subitem: item, count: 1 | 변경사항 복구 |
| section.interGroupSpacing = 20 | 20 | 10 | 좌우 padding 줄이기 |
QuickFocusListViewController의 UIViewController에서
        let groupSize = NSCollectionLayoutSize(widthDimension: .fractionalWidth(1), heightDimension: .estimated(50))
        // 기존
//        let group = NSCollectionLayoutGroup.horizontal(layoutSize: groupSize, subitem: item, count: 2)
        // 변경: 유연하게 할당될 수 있도록
		let group = NSCollectionLayoutGroup.horizontal(layoutSize: groupSize, subitems: [item])
        group.interItemSpacing = .fixed(10)

        let section = NSCollectionLayoutSection(group: group)
        section.contentInsets = NSDirectionalEdgeInsets(top: 30, leading: 20, bottom: 30, trailing: 20)
        section.interGroupSpacing = 20
        // 추가: .continuous, .groupPagingCentered
        section.orthogonalScrollingBehavior = .continuous
Collection View Cell
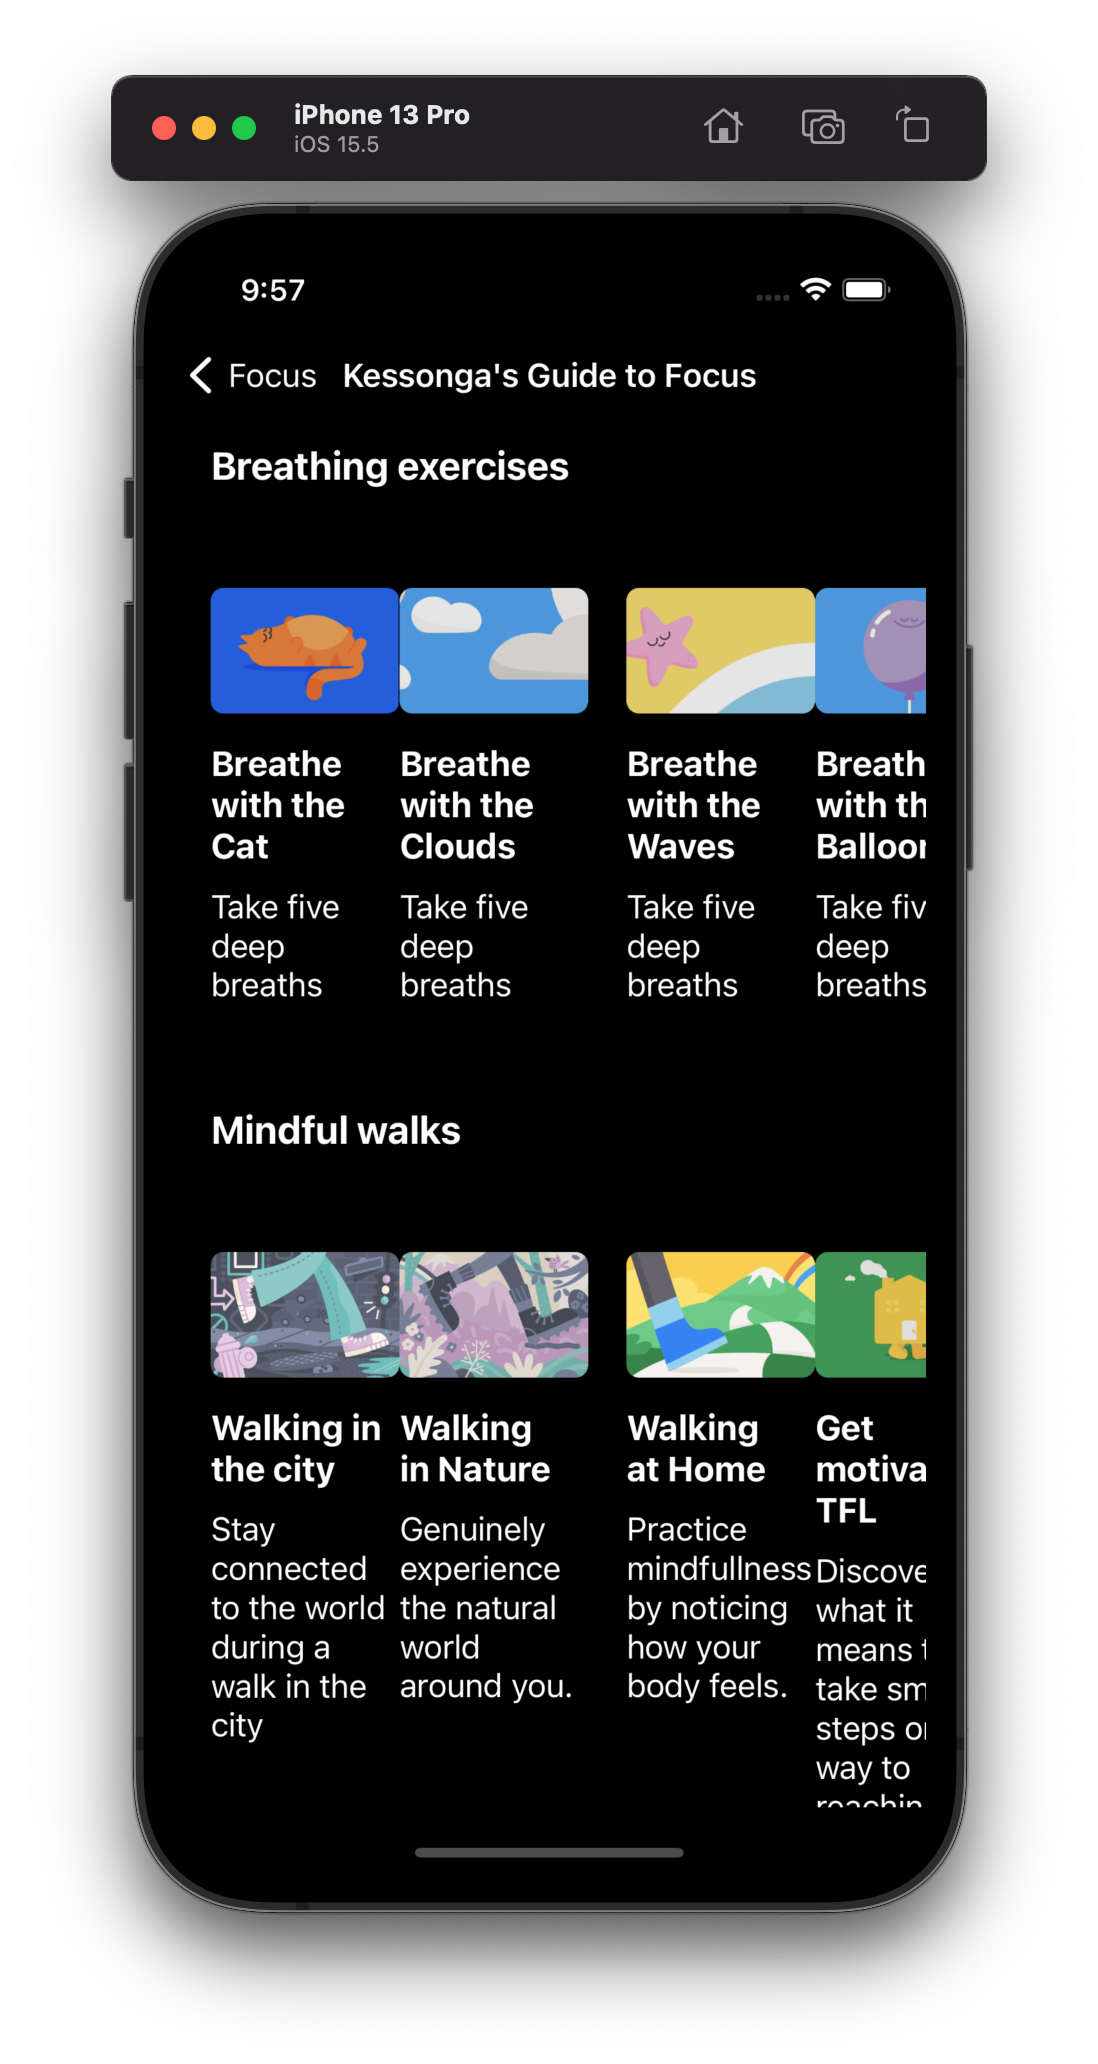
수평적으로 화면 조회되지만, 각 화면에 하나의 group만 존재하도록 설정됨


(참고) corner의 값 조절 - 코드에 반영하지 않음
collectionView.collectionViewLayout = layout()
collectionView.delegate = self
// 추가: width의 값이 동적으로 조절
collectionView.clipsToBounds = true
→ group의 fractionalWidth도 item과 동일하게 설정해 주어야 함 + spacing 값 또한 조절

UICollectionViewCompositionalLayout

출처: https://developer.apple.com/documentation/uikit/uicollectionviewcompositionallayout
func createBasicListLayout() -> UICollectionViewLayout {
    let itemSize = NSCollectionLayoutSize(widthDimension: .fractionalWidth(1.0),
                                         heightDimension: .fractionalHeight(1.0))
    let item = NSCollectionLayoutItem(layoutSize: itemSize)

    let groupSize = NSCollectionLayoutSize(widthDimension: .fractionalWidth(1.0),
                                          heightDimension: .absolute(44))
    let group = NSCollectionLayoutGroup.horizontal(layoutSize: groupSize,
                                                     subitems: [item])

    let section = NSCollectionLayoutSection(group: group)

    let layout = UICollectionViewCompositionalLayout(section: section)
    return layout
}
group.interItemSpacing에 int 값을 넣으면 다음과 같은 오류 발생
Cannot assign value of type 'int' to type 'NSCollectionLayoutSpacing?'
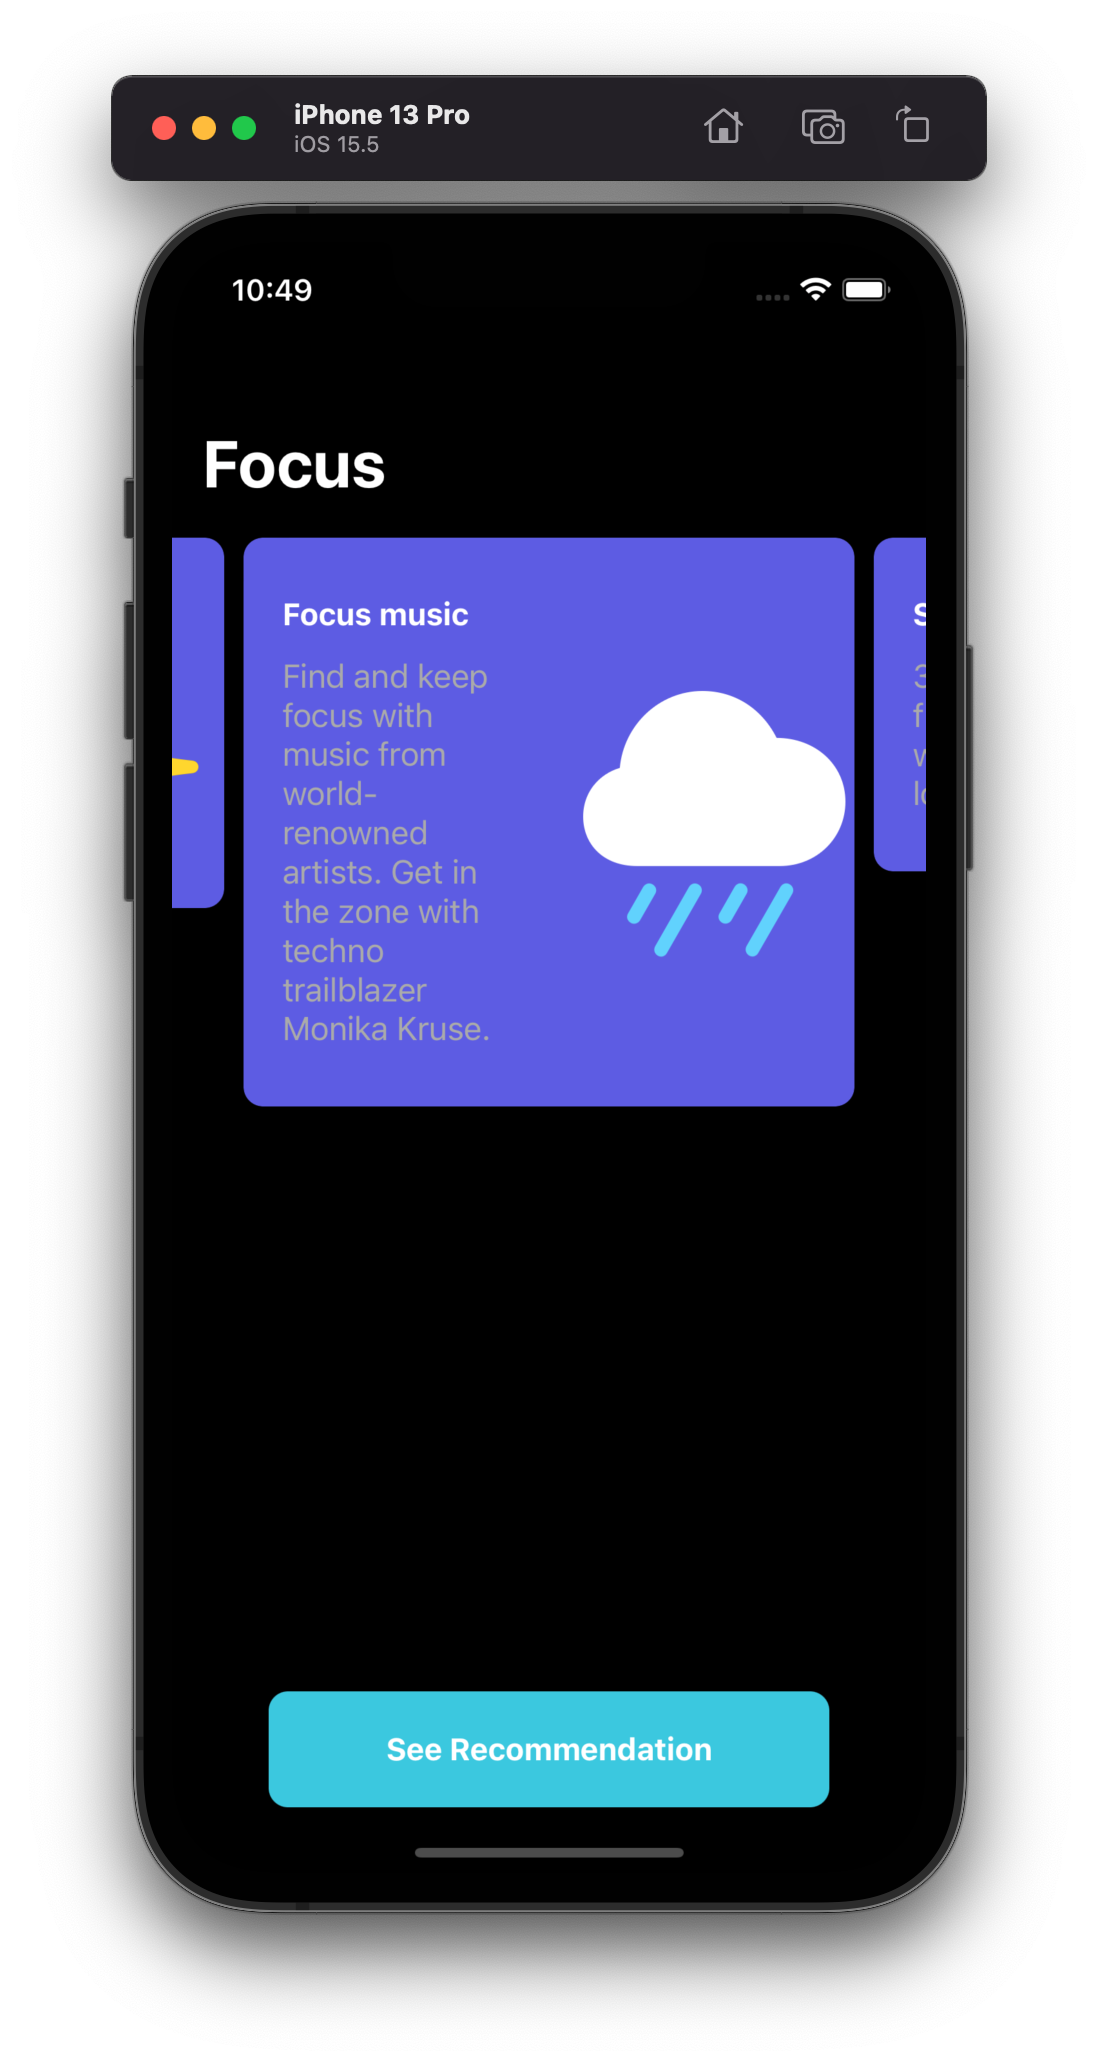
group size의 fractionWidth를 item size와 동일하게 0.5로 설정할 경우 다음과 같은 화면 조회
두 item처럼 보이는 부분이 하나의 item으로 설정됨
QuickFocusCell의 count를 subitems: [item] → subitem: item, count: 1 설정
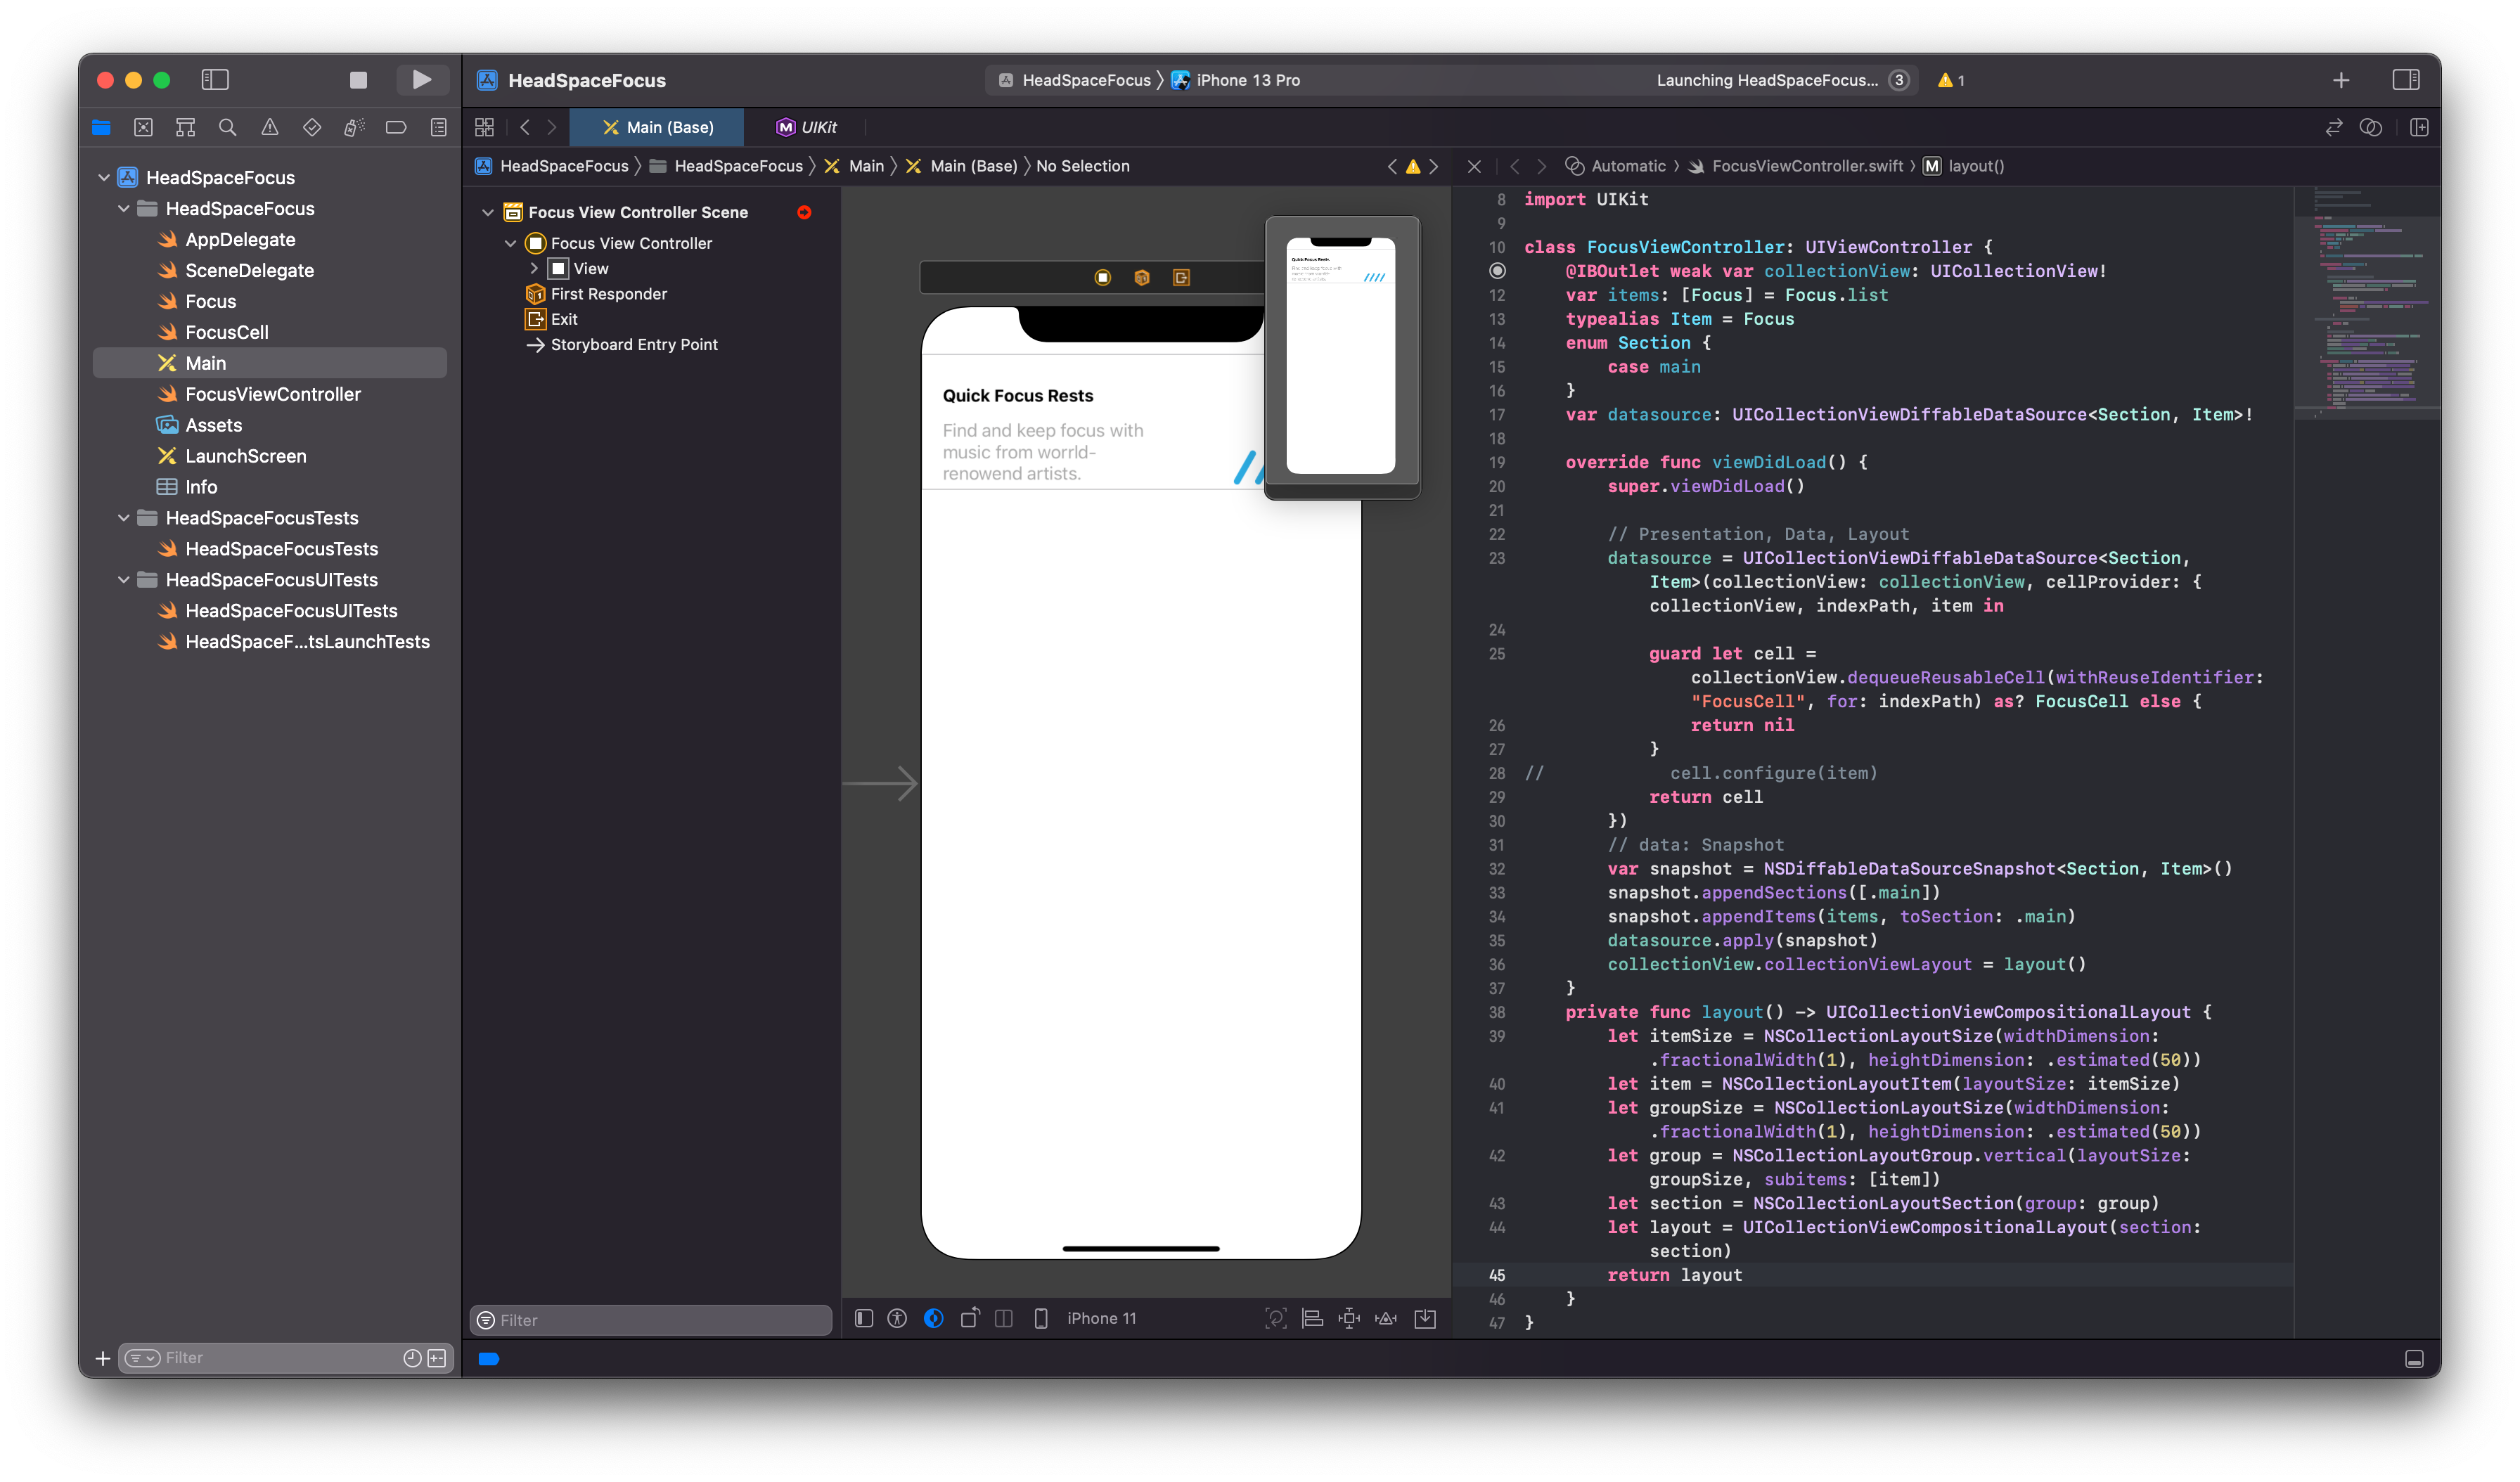
최종 코드
//
// FocusViewController.swift
// HeadSpaceFocus
//
// Created by sehee on 2022/07/10.
//
import UIKit
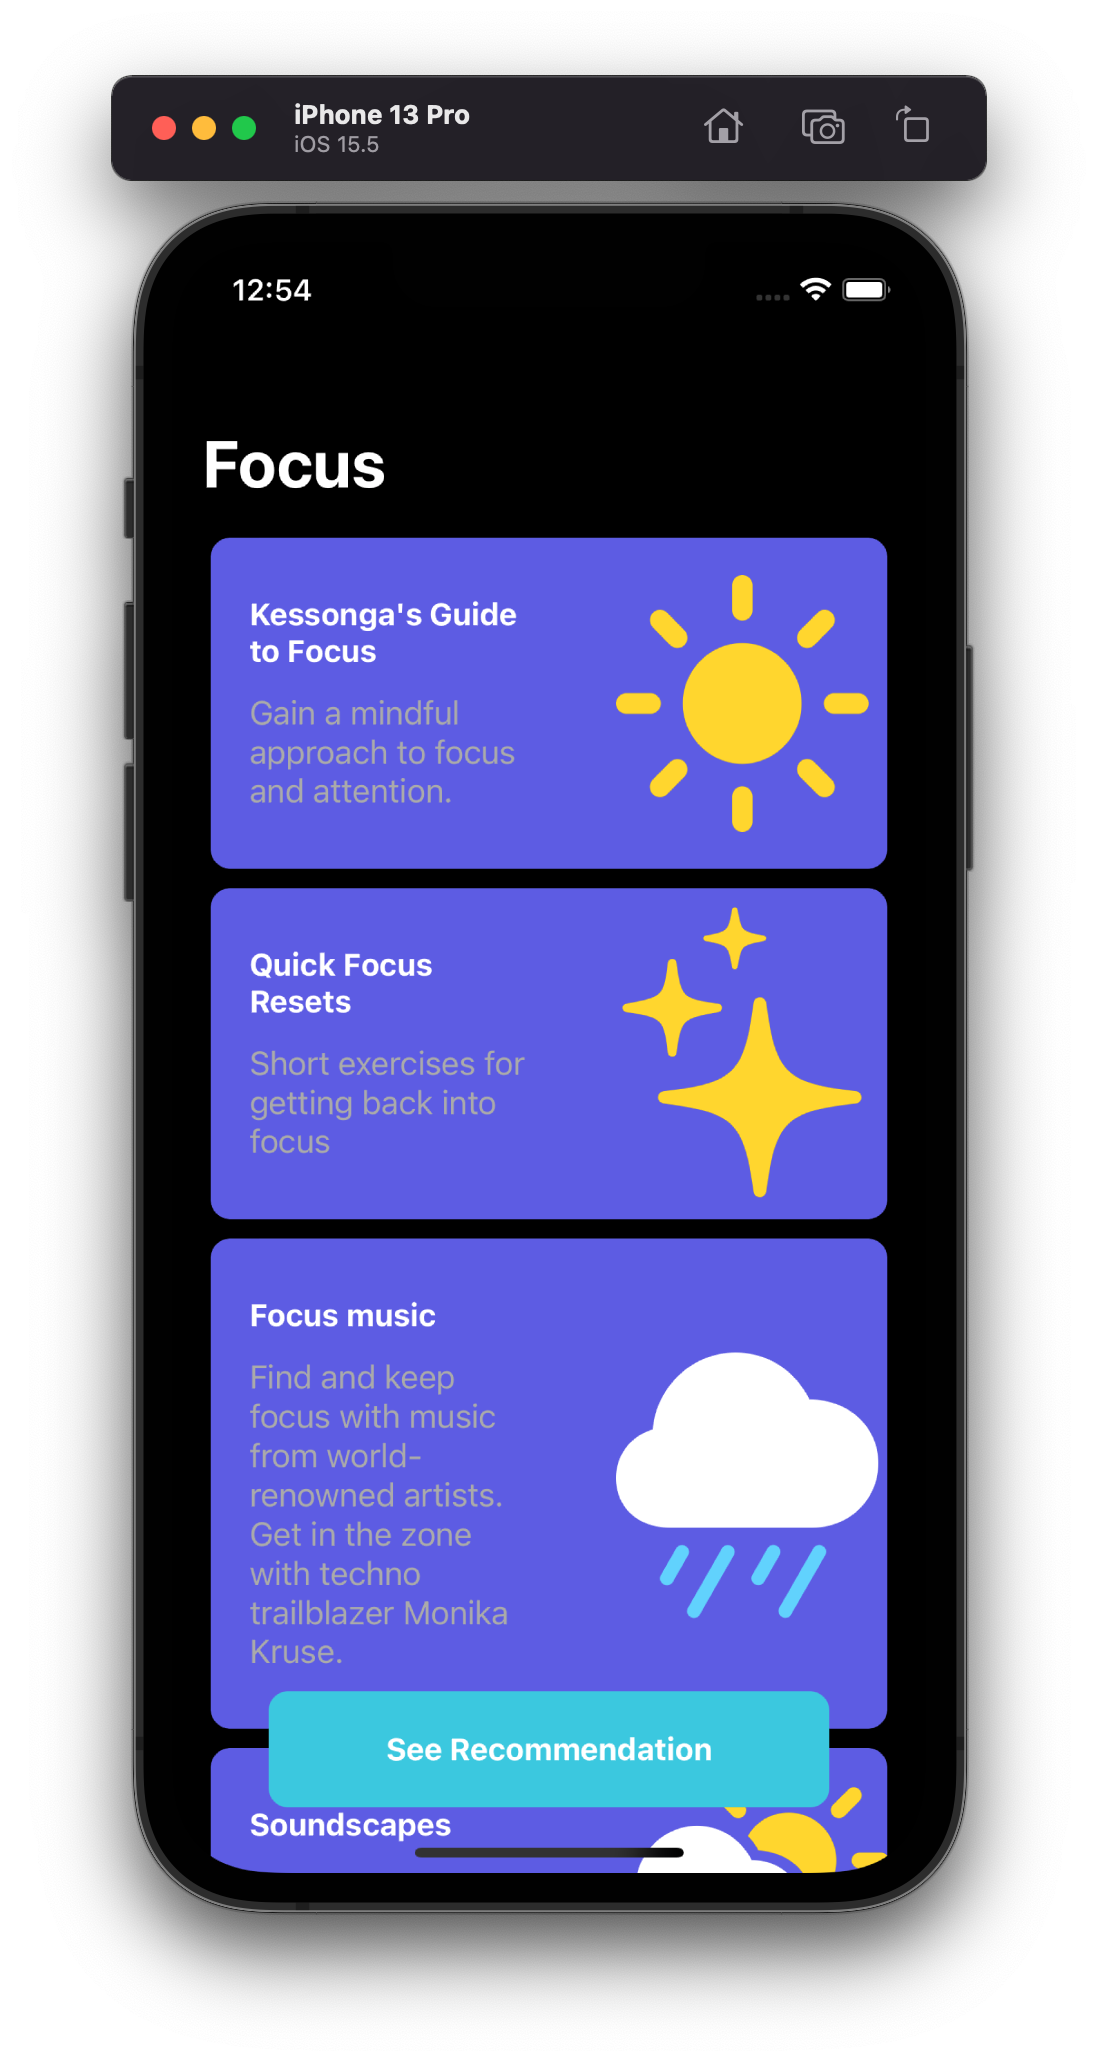
class FocusViewController: UIViewController {
@IBOutlet weak var collectionView: UICollectionView!
@IBOutlet weak var refreshButton: UIButton!
var curated: Bool = false
var items: [Focus] = Focus.list
typealias Item = Focus
enum Section {
case main
}
var datasource: UICollectionViewDiffableDataSource<Section, Item>!
override func viewDidLoad() {
super.viewDidLoad()
refreshButton.layer.cornerRadius = 10
// Presentation: Diffable Datasource + Cell Provider
datasource = UICollectionViewDiffableDataSource<Section, Item>(collectionView: collectionView, cellProvider: { collectionView, indexPath, item in
guard let cell = collectionView.dequeueReusableCell(withReuseIdentifier: "FocusCell", for: indexPath) as? FocusCell else {
return nil
}
cell.configure(item)
return cell
})
// Data: Snapshot
var snapshot = NSDiffableDataSourceSnapshot<Section, Item>()
snapshot.appendSections([.main])
snapshot.appendItems(items, toSection: .main)
datasource.apply(snapshot)
// Layout
collectionView.collectionViewLayout = layout()
collectionView.delegate = self
updateButtonTitle()
}
private func layout() -> UICollectionViewCompositionalLayout {
let itemSize = NSCollectionLayoutSize(widthDimension: .fractionalWidth(0.9), heightDimension: .estimated(50))
let item = NSCollectionLayoutItem(layoutSize: itemSize)
let groupSize = NSCollectionLayoutSize(widthDimension: .fractionalWidth(0.9), heightDimension: .estimated(50))
let group = NSCollectionLayoutGroup.horizontal(layoutSize: groupSize, subitems: [item])
let section = NSCollectionLayoutSection(group: group)
section.contentInsets = NSDirectionalEdgeInsets(top: 10, leading: 5, bottom: 10, trailing: 5)
section.interGroupSpacing = -25
section.orthogonalScrollingBehavior = .groupPagingCentered
let layout = UICollectionViewCompositionalLayout(section: section)
return layout
}
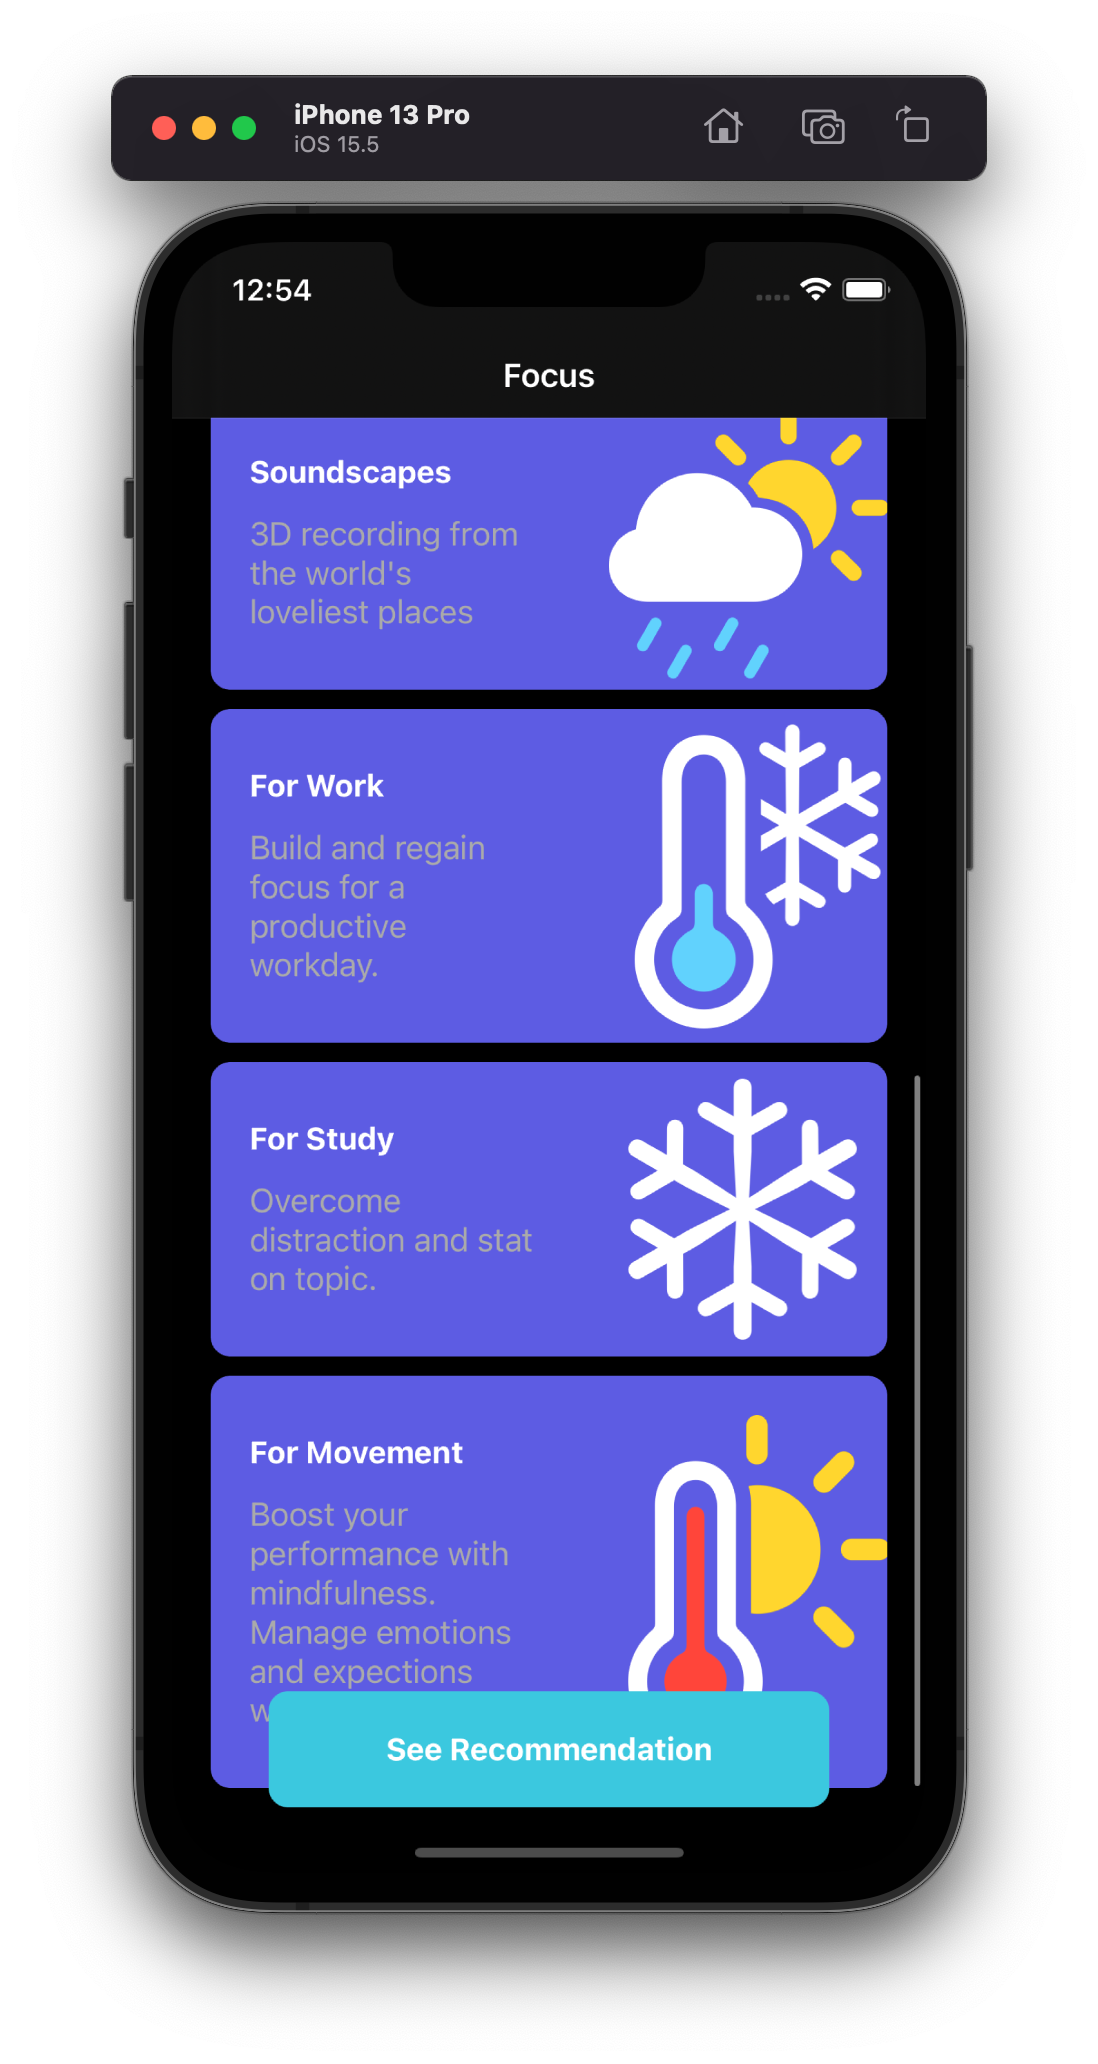
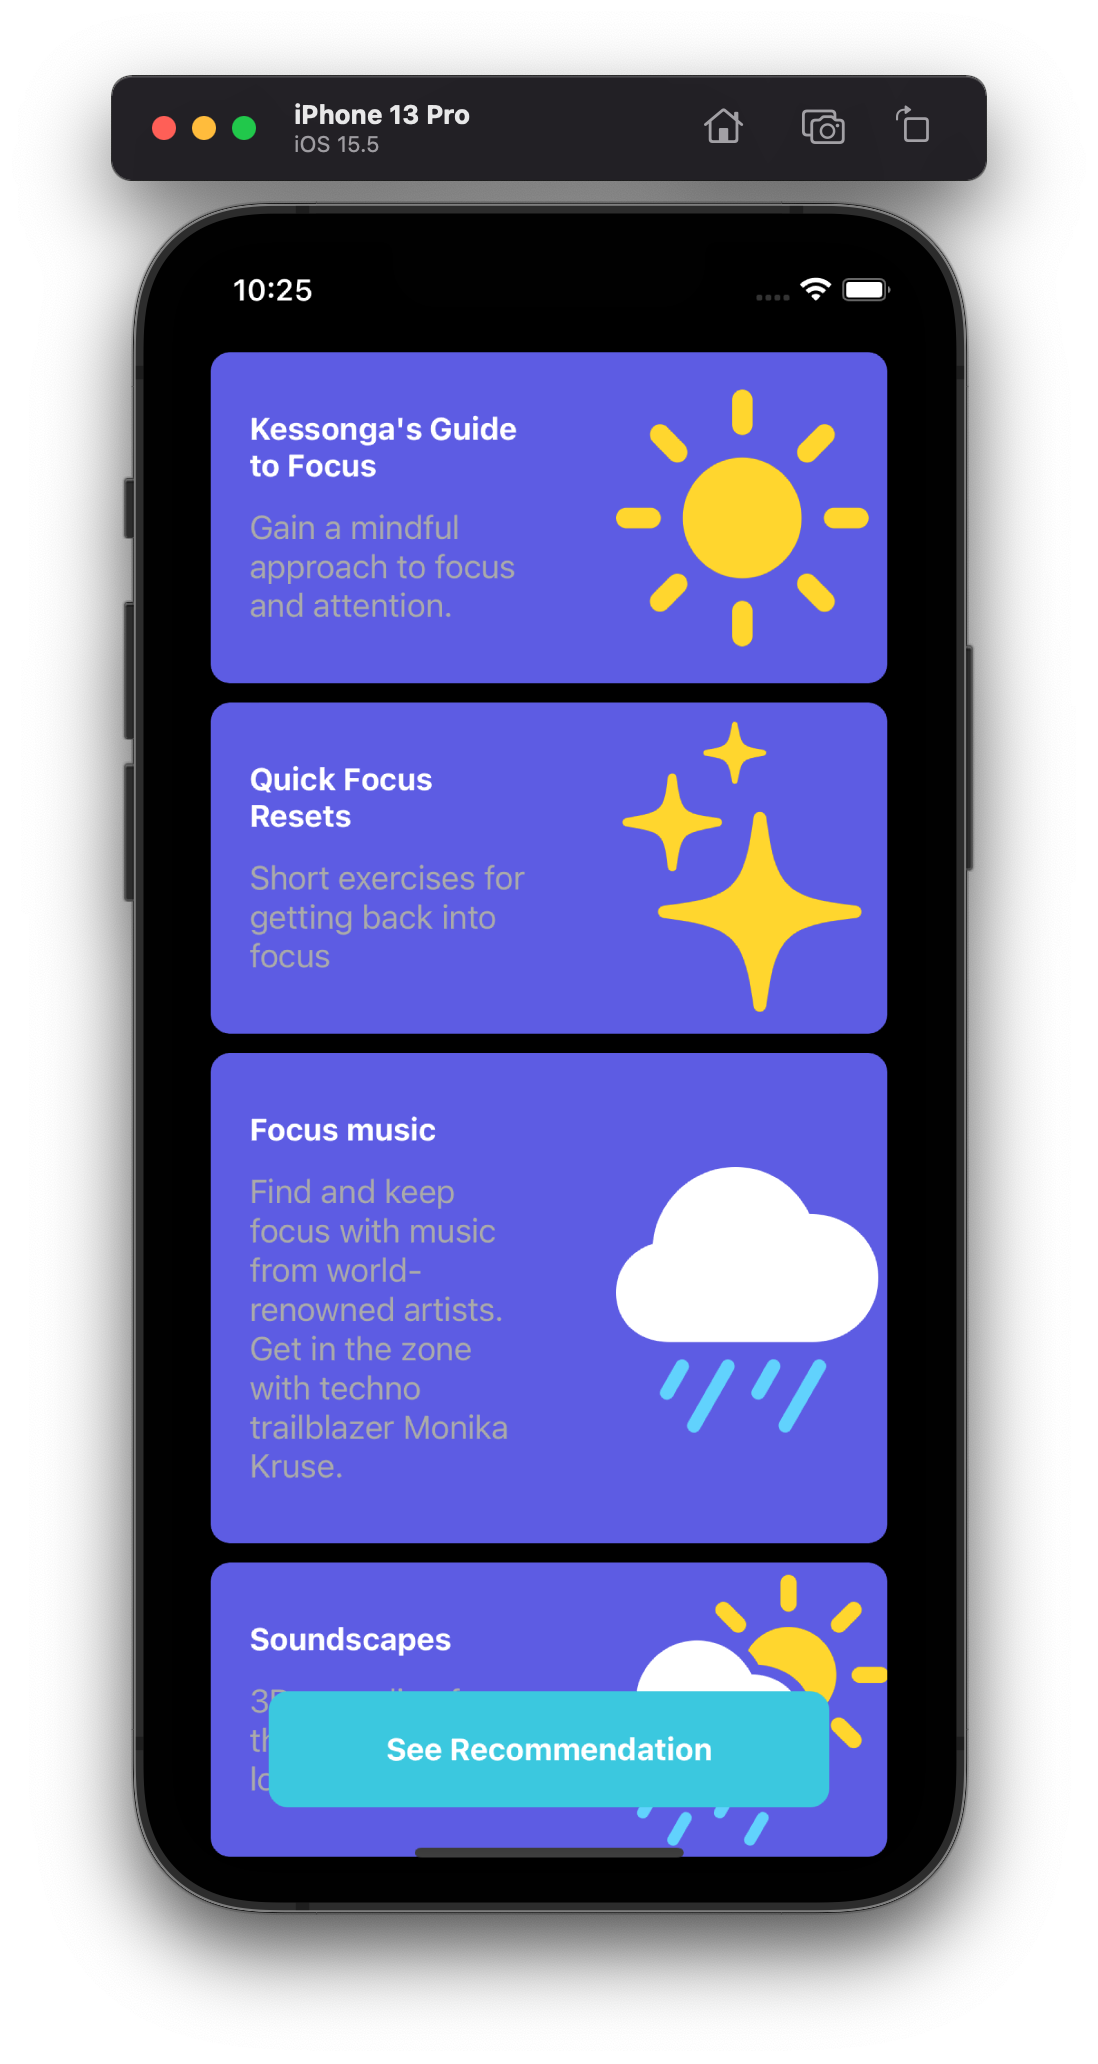
func updateButtonTitle() {
let title = curated ? "See All" : "See Recommendation"
refreshButton.setTitle(title, for: .normal)
}
@IBAction func refreshButtonTapped(_ sender: Any) {
curated.toggle()
self.items = curated ? Focus.recommendations : Focus.list
var snapshot = NSDiffableDataSourceSnapshot<Section, Item>()
snapshot.appendSections([.main])
snapshot.appendItems(items, toSection: .main)
datasource.apply(snapshot)
updateButtonTitle()
}
}
extension FocusViewController: UICollectionViewDelegate {
func collectionView(_ collectionView: UICollectionView, didSelectItemAt indexPath: IndexPath) {
let item = items[indexPath.item]
// print(">>> \(item.title)")
let storyboard = UIStoryboard(name: "QuickFocus", bundle: nil)
let vc = storyboard.instantiateViewController(withIdentifier: "QuickFocusListViewController") as! QuickFocusListViewController
vc.title = item.title
// present(vc, animated: true)
navigationController?.pushViewController(vc, animated: true)
}
}//
// QuickFocusListViewController.swift
// HeadSpaceFocus
//
// Created by sehee on 2022/07/21.
//
import UIKit
class QuickFocusListViewController: UIViewController {
@IBOutlet weak var collectionView: UICollectionView!
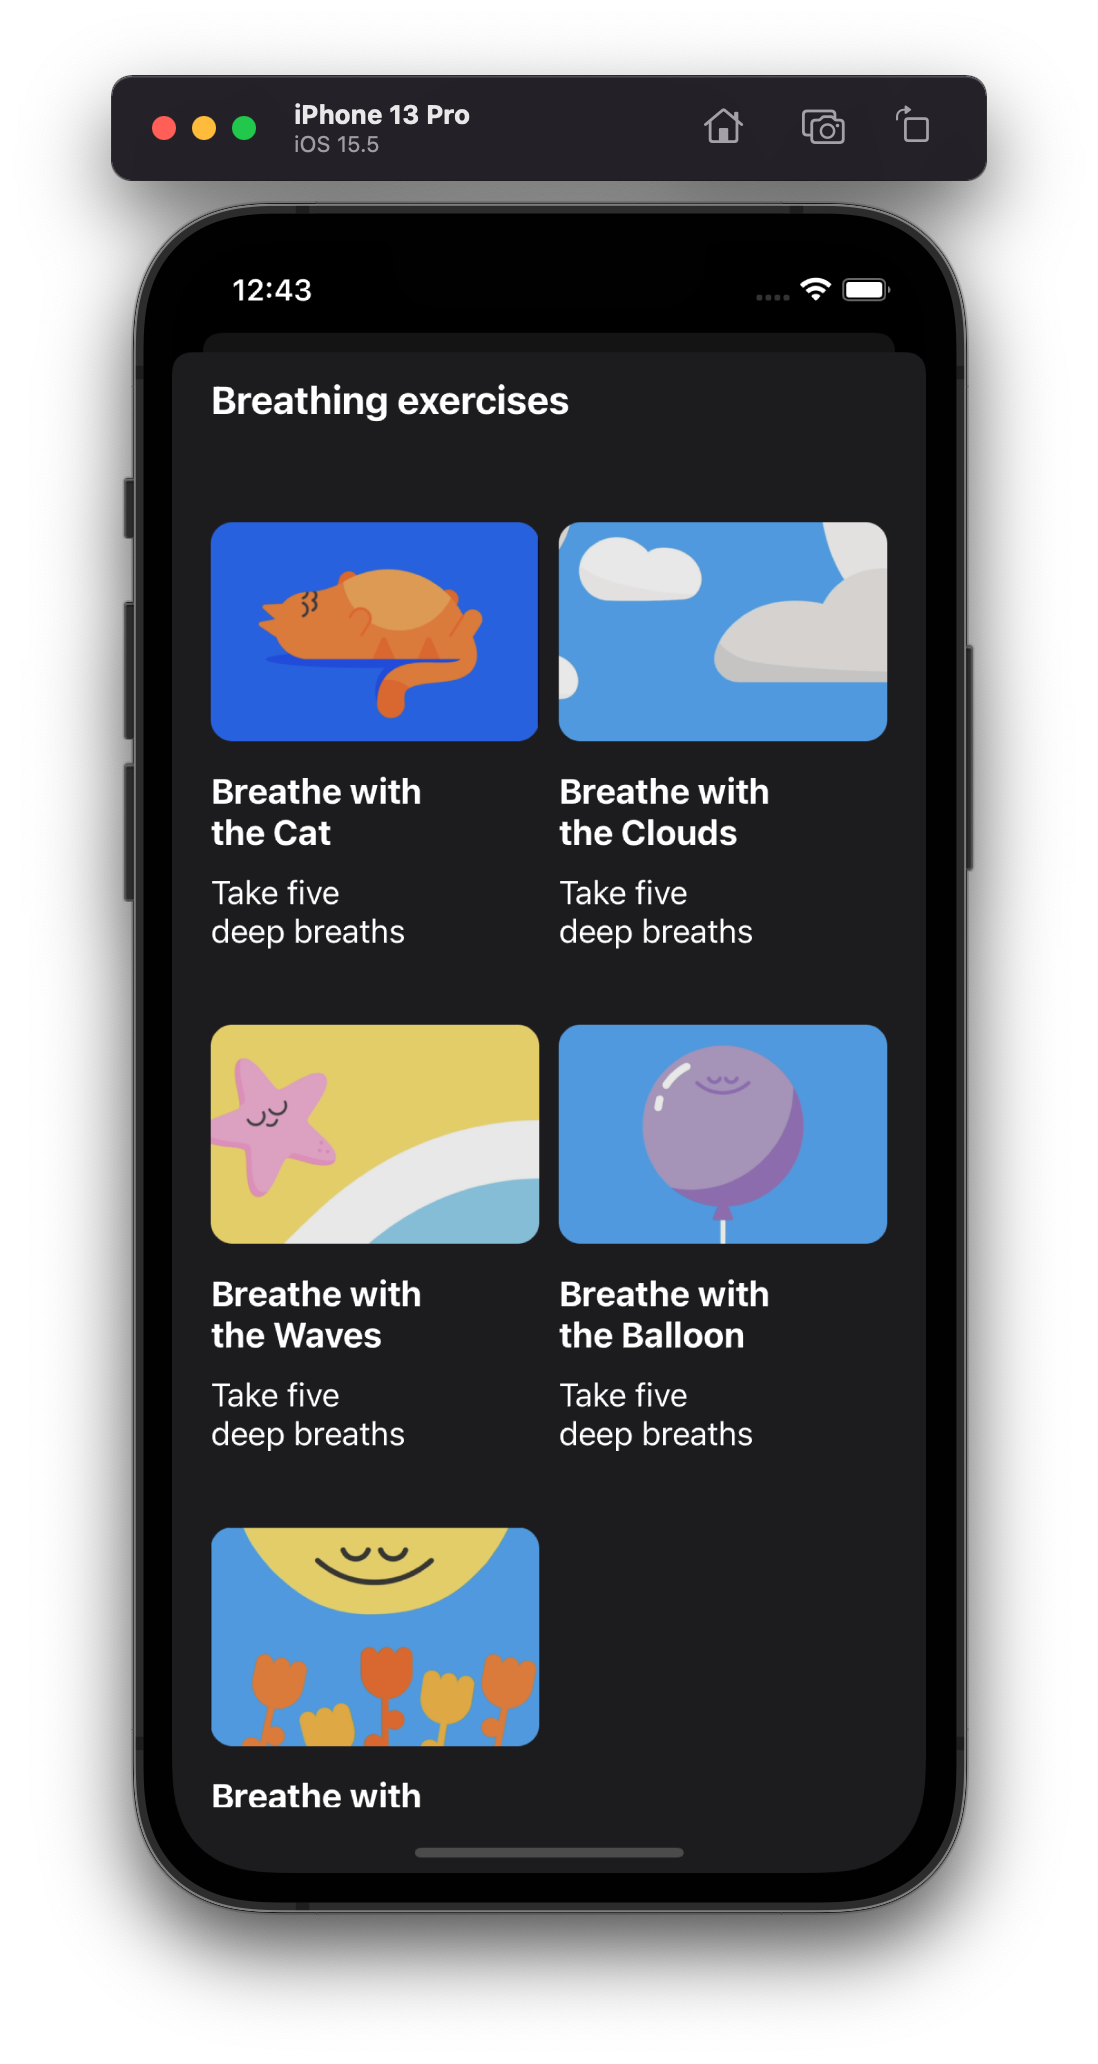
let breathingList = QuickFocus.breathing
let walkingList = QuickFocus.walking
enum Section: CaseIterable {
case breathe
case walking
var title: String {
switch self {
case .breathe: return "Breathing exercises"
case .walking: return "Mindful walks"
}
}
}
typealias Item = QuickFocus
var datasource: UICollectionViewDiffableDataSource<Section, Item>!
override func viewDidLoad() {
super.viewDidLoad()
// enum Section CaseIterable 생성한 코드가 다음 내용과 동일
// Section.allCases
// let allItems: [Section] = [.breathe, .walking]
// 생성 코드가 다음과 같이 쓰일 수 있음
// let section: Section = .breathe
// section.title
// Presentation
datasource = UICollectionViewDiffableDataSource<Section, Item>(collectionView: collectionView, cellProvider: { collectionView, indexPath, item in
guard let cell = collectionView.dequeueReusableCell(withReuseIdentifier: "QuickFocusCell", for: indexPath) as? QuickFocusCell else {
return nil
}
cell.configure(item)
return cell
})
datasource.supplementaryViewProvider = { (collectionView, kind, indexPath) in
            guard let header = collectionView.dequeueReusableSupplementaryView(ofKind: UICollectionView.elementKindSectionHeader, withReuseIdentifier: "QuickFocusHeaderView", for: indexPath) as? QuickFocusHeaderView else {
                return nil
            }
            let allSections = Section.allCases
            let section = allSections[indexPath.section]
            header.configure(section.title)
            return header
        }
// Data
var snapshot = NSDiffableDataSourceSnapshot<Section, Item>()
snapshot.appendSections([.breathe, .walking])
// 위의 코드와 동일
// snapshot.appendSections(Section.allCases)
snapshot.appendItems(breathingList, toSection: .breathe)
snapshot.appendItems(walkingList, toSection: .walking)
datasource.apply(snapshot)
// Layout
collectionView.collectionViewLayout = layout()
self.navigationItem.largeTitleDisplayMode = .never
}
private func layout() -> UICollectionViewCompositionalLayout {
let itemSize = NSCollectionLayoutSize(widthDimension: .fractionalWidth(0.5), heightDimension: .estimated(50))
let item = NSCollectionLayoutItem(layoutSize: itemSize)
let groupSize = NSCollectionLayoutSize(widthDimension: .fractionalWidth(0.5), heightDimension: .estimated(50))
let group = NSCollectionLayoutGroup.horizontal(layoutSize: groupSize, subitem: item, count: 1)
group.interItemSpacing = .fixed(10)
let section = NSCollectionLayoutSection(group: group)
section.contentInsets = NSDirectionalEdgeInsets(top: 30, leading: 20, bottom: 30, trailing: 20)
section.interGroupSpacing = 10
section.orthogonalScrollingBehavior = .continuous
let headerSize = NSCollectionLayoutSize(widthDimension: .fractionalWidth(1), heightDimension: .absolute(50))
        let header = NSCollectionLayoutBoundarySupplementaryItem(layoutSize: headerSize, elementKind: UICollectionView.elementKindSectionHeader, alignment: .top)
        section.boundarySupplementaryItems = [header]
let layout = UICollectionViewCompositionalLayout(section: section)
return layout
}
}
'Development > Swift' 카테고리의 다른 글
| [Swift] iOS 앱 개발(Xcode) Byte Degree - week.08 (0) | 2022.08.26 |
|---|---|
| [Swift] iOS 앱 개발(Xcode) Byte Degree - week.07 (0) | 2022.08.25 |
| [Swift] iOS 앱 개발(Xcode) Byte Degree - week.05 (0) | 2022.07.16 |
| [Swift] iOS 앱 개발(Xcode) Byte Degree - week.04 (0) | 2022.07.10 |
| [Swift] iOS 앱 개발(Xcode) Byte Degree - week.03 (0) | 2022.07.01 |